
Bree here, from Home Zone Furniture.
Summer has arrived in North Texas, which means it’s officially time for swimming, gardening, picnics and lazy days spent at home with family. If you plan to spend more time at your humble abode over the next few months, you may be thinking about treating your home to a seasonal refresh.
One of the easiest way to transform a room is with some well-chosen accent furniture. From craftsmanship to materials and color, these four standout pieces from the Home Zone Furniture collection will bring new life and a dose of fun to your home this season.
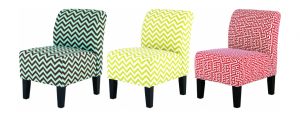
For comfy color, choose the Bombay accent chair. This bold seat is sure to mix up a home ruled by neutral tones. Sturdy in structure yet nicely cushioned, this chair is a great addition to any living space. Set off the daring chevron stripe pattern by placing throw pillows in complementary colors and patterns around the room.
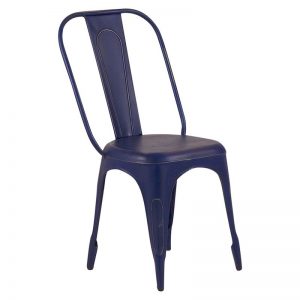
Liven up an empty corner using the blue Elliot chair. There are hundreds of ways you could use this lightweight, brightly colored accent chair in your home, because it’s simple and doesn’t take up much space. I love to use it as the base of a fabulous vignette at the end of a hallway or in a lonely corner. If the space you choose is already empty, start with the Elliot chair. Hang some small art pieces vertically overhead, stack a few coffee table books below or on top of the chair, add a few personal effects, and you’re done!
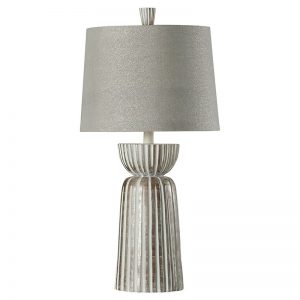
Make a statement with the Nina two table lamp set. Contemporary, sculptural and wonderfully metallic, the Nina lamp complements a variety of decor styles, from traditional to contemporary. Whether you place these on each bedside table or on either side of a dining room buffet, this silvery lamp is a chic standout in a formal or informal setting.
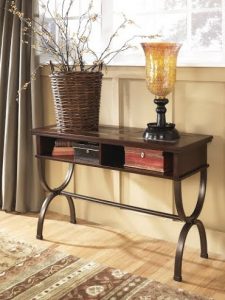
Show off your personal style with the Zanders sofa table. This long, thin table has a tubular metal frame and mosaic inlay, and it’s the answer to making empty hallways or entryways useful again. The Zanders is traditionally used to beautify the backside of a sofa placed in the middle of the room. That being said, you could also use it to fill a bare wall. Once you find the perfect spot for it, you can decorate it with planters, stacks of books, or picture frames — let your style take the lead.
Happy summer!
Bree